
Corpsing a Skeleton
Part 2: Dry Brushing, Hair, and Eyes

Materials:
-
hot glue gun
-
white glue or "Sculpt or Coat"
-
styrofoam ball
-
acrylic paint
-
wig
-
scissors
-
epoxy
Here we'll look at the difference some dry brushing, a little hair and an eyeball can make.
Part A: Dry Brushing
Take a bit of white acrylic paint and mix it with just a touch of dark brown.
You want a light colour that looks almost grey.
This is your highlight. It is going to bring out all the ridges and raised edges on your corpse.
Dab the tiniest bit of paint onto your brush (you may even want to wipe some off onto

newspaper) and then drag the brush ever so lightly along the surface of the skin. You don't want to get the paint into any cracks or crevices. Resist the urge to put a lot of paint on the brush. If you want more highlight on an area, simply dry brush over it a number of times. Focus on bumps and knots and twists.
The pictures here were taken outside in the sunlight, so you can really see the white highlights. It isn't as noticeable under regular lighting, and in a dark room it won't even register as white but those raised edges will stand out.

Part B: Adding Hair
You can get an old wig at Value Village or another second hand store for next to nothing. Cut a lock of hair from the wig. Take a small clump of strands and hold them against the skull. With a paint brush, apply white glue (I used a product called Sculpt or Coat) to the ends against the skull (about 2 inches worth). Be generous but level it all out. The glue will dry clear.

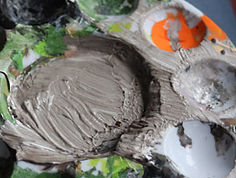
I used a styrofoam ball for my eyeball. I cut it in half then tested how it fit in the eye socket. It was still too big so I cut it in half again (leaving me with a 1/4 of a styrofoam ball).
I painted the base a very light blue. When it dried, I painted white overtop (but let some of the blue still be visible).
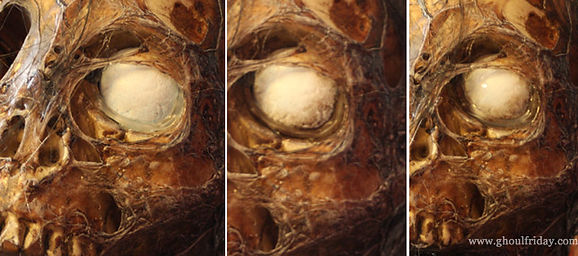
I warmed up my glue gun, added glue to the socket, then slipped the eyeball into place.

I added a line of glue around the edge of the eye (below, left image). Then I dabbed some dark brown paint over the dried glue, watered down the paint on my brush, and added a brown wash to the outside edges of the eyeball itself (centre image).
Finally, I took some quick drying epoxy (you could use a high gloss varnish) and coated the eyeball to make it shiny.
I removed some of the plastic skin from the teeth (and even sliced a hole into one front tooth to make it look more decayed).
I was really happy with how this turned out. I don't often keep large props that I make, but I think she'll be with me a long time.


